How-to
How to Convert HEIC to JPG on Mac (Batch)
By Nguyen Truong Duy · · 7 min read
To convert HEIC to JPG on a Mac, select the photos in Finder, Control-click them and choose Quick Actions ▸ Convert Image, then pick JPEG. That works for one photo or a whole folder, and macOS has three more built-in ways that give you more control over quality, size and where the files go.
HEIC is the format iPhones use by default. It's smaller than JPEG at the same quality, and every Mac opens it, but plenty of websites, Windows PCs, print shops and older apps still want JPG. Here are the options, from the quickest to the most flexible.
Finder Quick Action: Convert Image
The fastest built-in way, and it handles batches. It has been in Finder since macOS Monterey.
- In Finder, select one or more HEIC files (Command-click to pick several, or Command-A for the whole folder).
- Control-click (or right-click) the selection and choose Quick Actions ▸ Convert Image.
- Set Format to JPEG.
- Choose an Image Size: Small, Medium, Large or Actual Size. Pick Actual Size to keep the full resolution; the others scale the photo down.
- Leave Preserve Metadata on if you want to keep the date, camera details and location.
- Click Convert to JPEG.
These are the labels in macOS 27; earlier versions may word them slightly differently.
The JPGs land next to the originals, which stay untouched. Convert Image is also in the Finder preview pane when you select a single image.
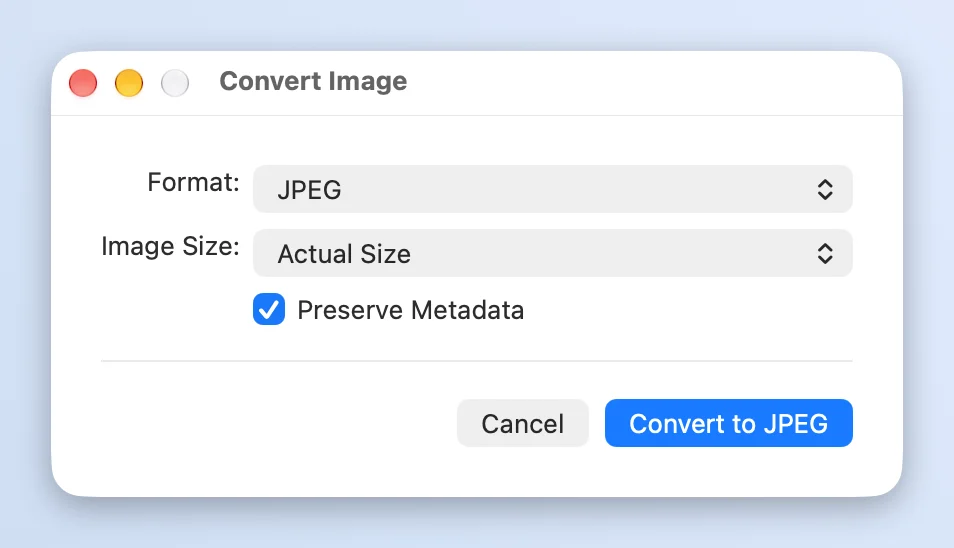
When it's enough: most of the time. What it doesn't do is let you set the JPEG quality, choose a different output folder, or resize to an exact pixel size.
Preview: File ▸ Export
Preview gives you a quality slider.
For one photo:
- Open the HEIC file in Preview.
- Choose File ▸ Export.
- Set Format to JPEG and drag the Quality slider (further right is better quality and a bigger file).
- Choose a name and location, then click Save.
For many photos at once:
- Select all the HEIC files in Finder and open them together (Command-O, or drag them onto Preview's icon in the Dock). They open in one window with thumbnails in the sidebar.
- Click a thumbnail in the sidebar and press Command-A to select them all.
- Choose File ▸ Export Selected Images….
- If you don't see the format settings, click Show Options. Set Format to JPEG and the quality.
- Pick a destination folder and click Choose.
When it's enough: a few dozen photos where you care about quality or want them in a separate folder. Preview gets slow when you open hundreds of large files at once.
Photos: export as JPEG
If the HEIC photos are in your Photos library (because they synced from your iPhone through iCloud), export them from there instead of digging for the files.
- Select the photos in Photos.
- Choose File ▸ Export ▸ Export [number] Photos.
- Set Photo Kind to JPEG.
- Click the arrow next to Photo Kind to set JPEG Quality, Color Profile and Size.
- Optionally, set File Name (use title, file name or a sequential number) and Subfolder Format.
- Click Export, choose a folder and click Export again.
Photos exports the edited version, with any crops and adjustments you made. It also lets you leave location information out of the exported files: turn off the Location Information checkbox in the export sheet.
When it's enough: photos already in your library. Note that Export Unmodified Original gives you the HEIC back, not a JPG (and a Live Photo as two files, the still and a video), while exporting a Live Photo as JPEG gives you only its still image.
Terminal: sips
Every Mac comes with sips, Apple's command-line image tool. It is the quickest way to convert a big folder,
and you can script it.
Open Terminal, go to the folder with the photos, and run:
cd ~/Pictures/iPhone
mkdir -p jpg
sips -s format jpeg -s formatOptions 85 *.[hH][eE][iI][cC] --out jpg
-s format jpegsets the output format.-s formatOptions 85sets the JPEG quality (0–100; you can also writelow,normal,highorbest).*.[hH][eE][iI][cC]matches.heicand.HEIC(iPhone files are often uppercase).--out jpgwrites the results into thejpgfolder, keeping each name and changing the extension to.jpg. The folder must exist first, hencemkdir.
To also shrink the photos, add -Z 2048 to limit the longest side to 2048 pixels.
To convert every HEIC in subfolders too:
find . -iname '*.heic' -exec sips -s format jpeg -s formatOptions 85 {} --out {}.jpg \;
That one writes IMG_0001.HEIC.jpg next to each original. sips never deletes the originals, but --out overwrites
a file with the same name without asking, so run it on a copy first if you're unsure.
When it's enough: if you're comfortable in Terminal, sips is free and fast and handles any number of files.
Skip HEIC on your iPhone
If you keep converting, stop the problem at the source. On the iPhone, Settings ▸ Camera ▸ Formats ▸ Most Compatible makes the camera shoot JPEG from now on (bigger files). It doesn't change photos you already took.
Don't count on the other iPhone settings to convert for you. Settings ▸ Apps ▸ Photos ▸ Transfer to Mac or PC ▸ Automatic converts to JPEG only when the computer can't read HEIC, and every Mac on macOS 15 can. AirDrop also sends HEIC as is to a device that supports it, and iCloud Photos keeps the original format.
A faster way with Macsential
Macsential is a Mac app that bundles everyday tools, and Convert Images is one of them. It does what Preview does, for any number of files, without opening them all or typing commands.
- Open Convert Images and drop the HEIC files (or a selection from Finder) onto the drop zone. You can keep adding more, and remove any from the list.
- Set Convert to to JPEG and choose the Quality (30–100%, 85% by default).
- Optionally turn on Resize and set the Longest edge in pixels. Smaller photos are never enlarged.
- Turn Keep metadata off if you don't want the date, camera details and location in the copies.
- Click Convert.
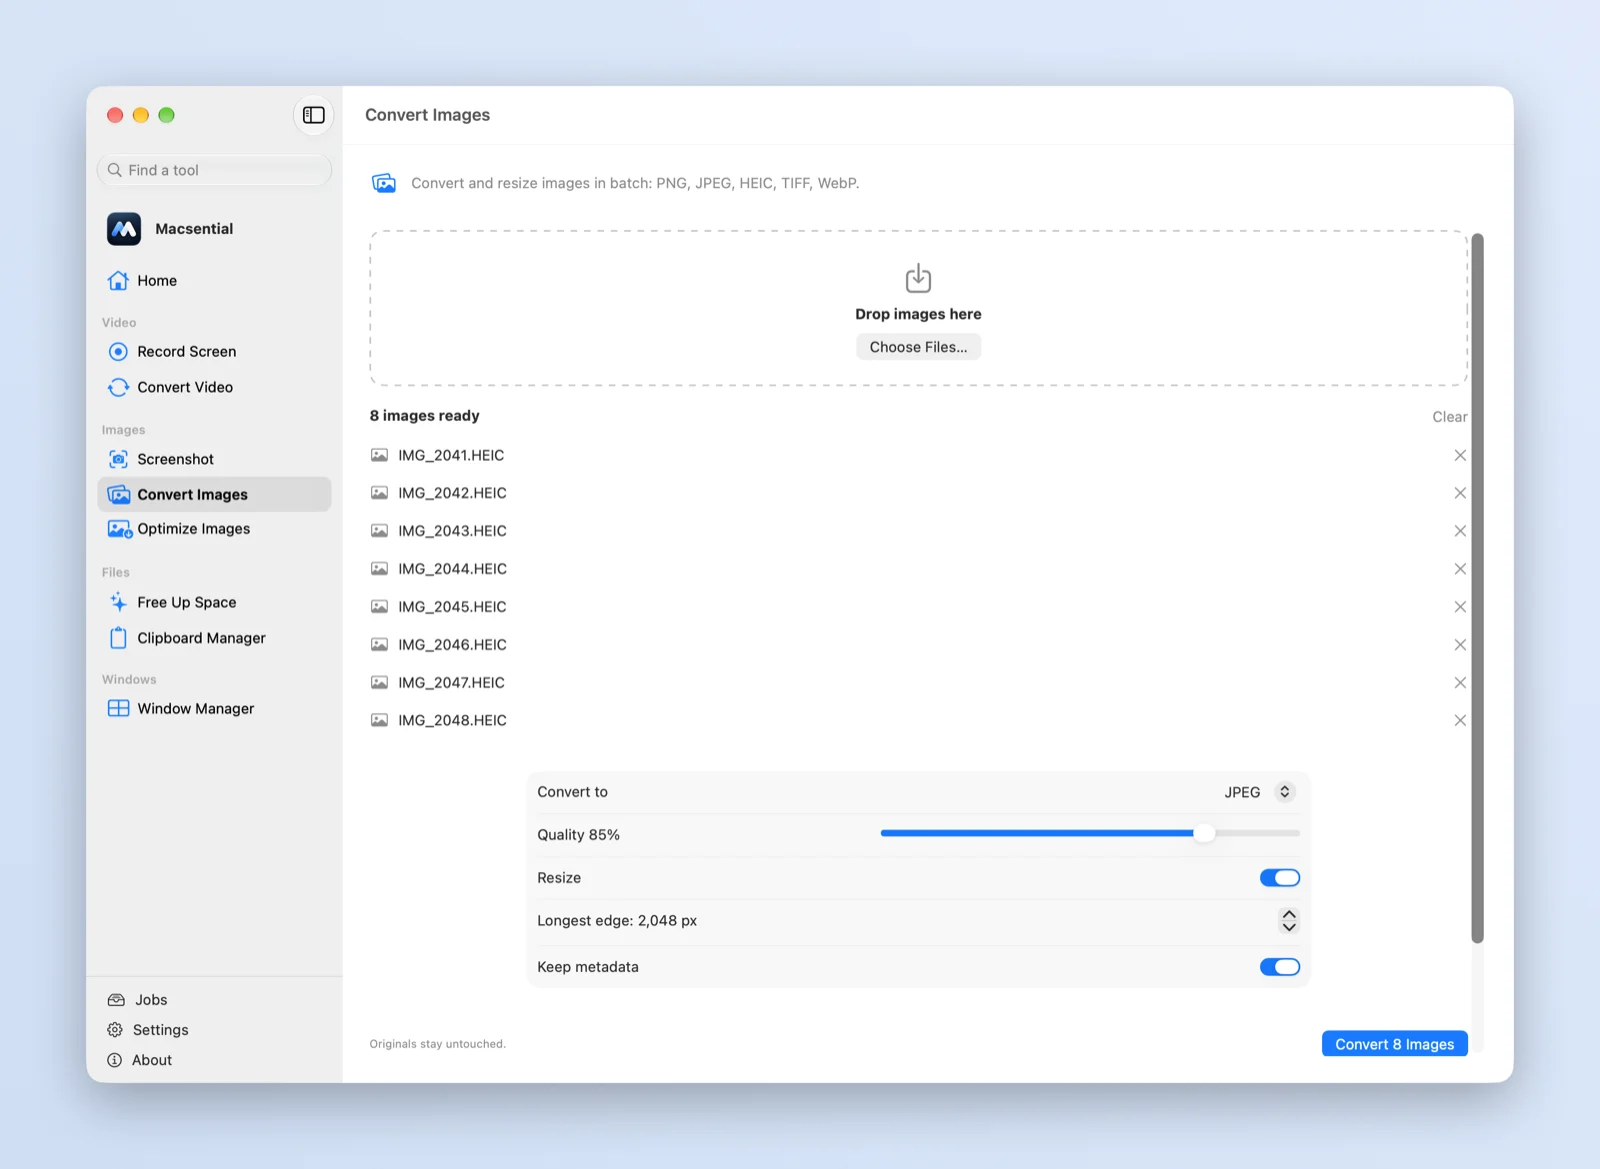
What it adds over the built-in ways:
- Batches without the waiting. The conversion runs in the background with progress in the Jobs list, and you can keep using the app. If one file is damaged, it's reported and the rest still convert.
- Nothing is overwritten. Originals are never touched, and when a file with the same name exists, the new one gets
a number, like
IMG_0001 (1).jpeg. If a conversion fails or you cancel, no half-written files are left behind. - Your choice of folder. By default the JPEGs go next to the originals. In Settings, under Output, you can send everything to one output folder instead.
- More formats. The same page converts between PNG, JPEG, HEIC, TIFF and WebP.
- Private. Everything happens on your Mac; nothing is uploaded.
Files are written with the .jpeg extension, which every app and website treats the same as .jpg.
From Finder
Macsential adds its own Finder Quick Action. Select the HEIC files, Control-click and choose Quick Actions ▸ Convert Images…: Macsential opens Convert Images with those files already in the list, so you only choose the settings and click Convert. If it isn't in the menu, turn it on in System Settings ▸ General ▸ Login Items & Extensions: under Extensions, show them By App and find Macsential.
Macsential runs on Apple Silicon Macs with macOS 15 Sequoia or later. It's a one-time purchase (pricing); download it here.
FAQ
Does converting HEIC to JPG lose quality?
A little, because JPEG is a lossy format and the photo is compressed again. At a quality of 85% or higher you won't see a difference in normal viewing, but the JPG will usually be larger than the HEIC. Keep the HEIC originals if you want the best copy.
Does converting keep the photo's date and location?
With Finder's Preserve Metadata option on, and with sips (we checked it on macOS 27), the date, camera details and
GPS location are copied to the JPG. Macsential copies them too while Keep metadata is on. If you're sharing the photos
publicly, that location travels with them, so turn the option off or leave location out of the Photos export.
Why can't I just rename .heic to .jpg?
Renaming changes only the extension, not the data inside. Some apps will open it anyway because they look at the contents, but many websites and Windows apps will reject the file or show an error. Convert it instead.
Can I convert HEIC to JPG on a Mac without any app?
Yes. Finder's Convert Image Quick Action, Preview, Photos and sips are all built into macOS and free. An app like
Macsential only saves time when you convert often or in large batches.